
Calibration
First Time Setup
On your first startup of the enVision K150S you will be required to complete a one time calibration of the color / depth camera, and you will be greeted with the following page:
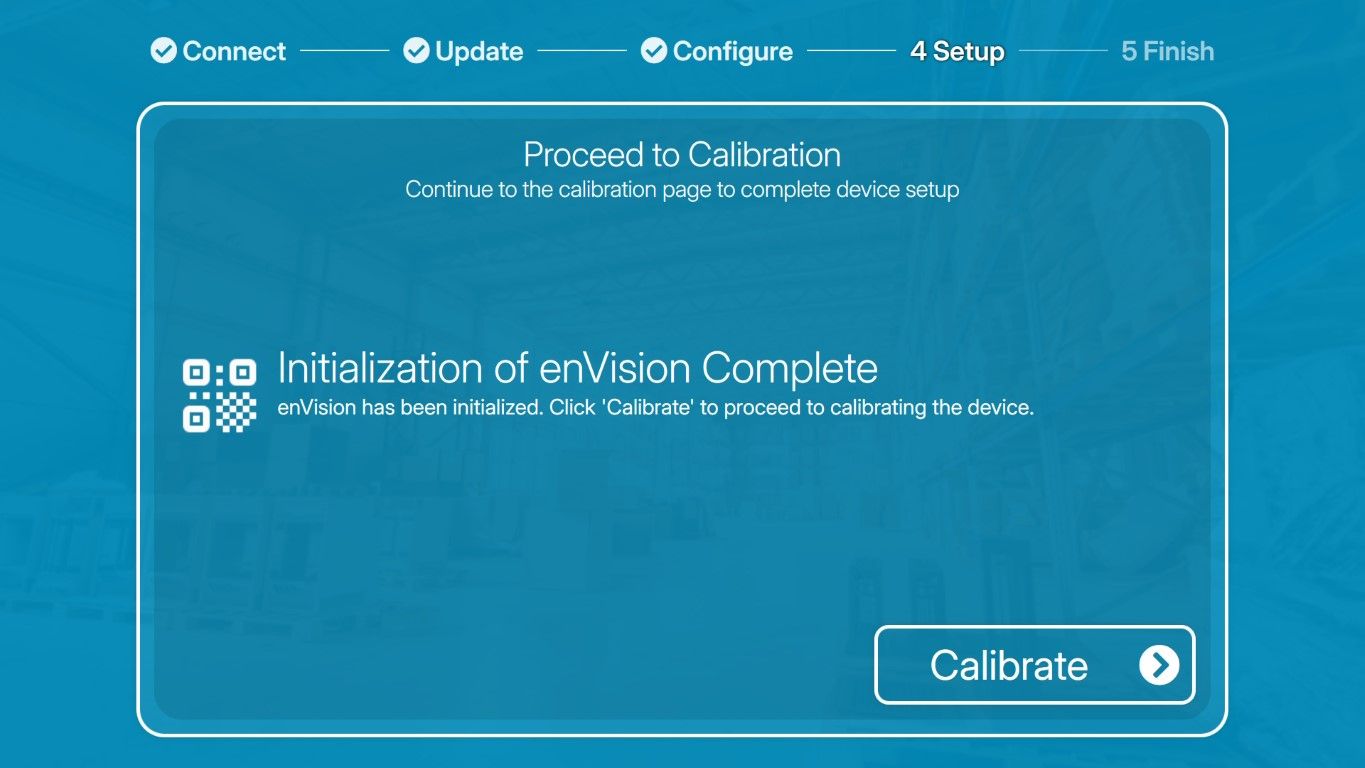
Tap the 'Calibrate' button to start the calibration process. It will calibrate against the scene viewed directly below the camera.
NOTE: Ensure the base or scale of the K150S and the surrounding area is clear of objects, as this may interfere with the calibration process. Additionally, ensure the base or scale is away from direct sunlight during calibration.
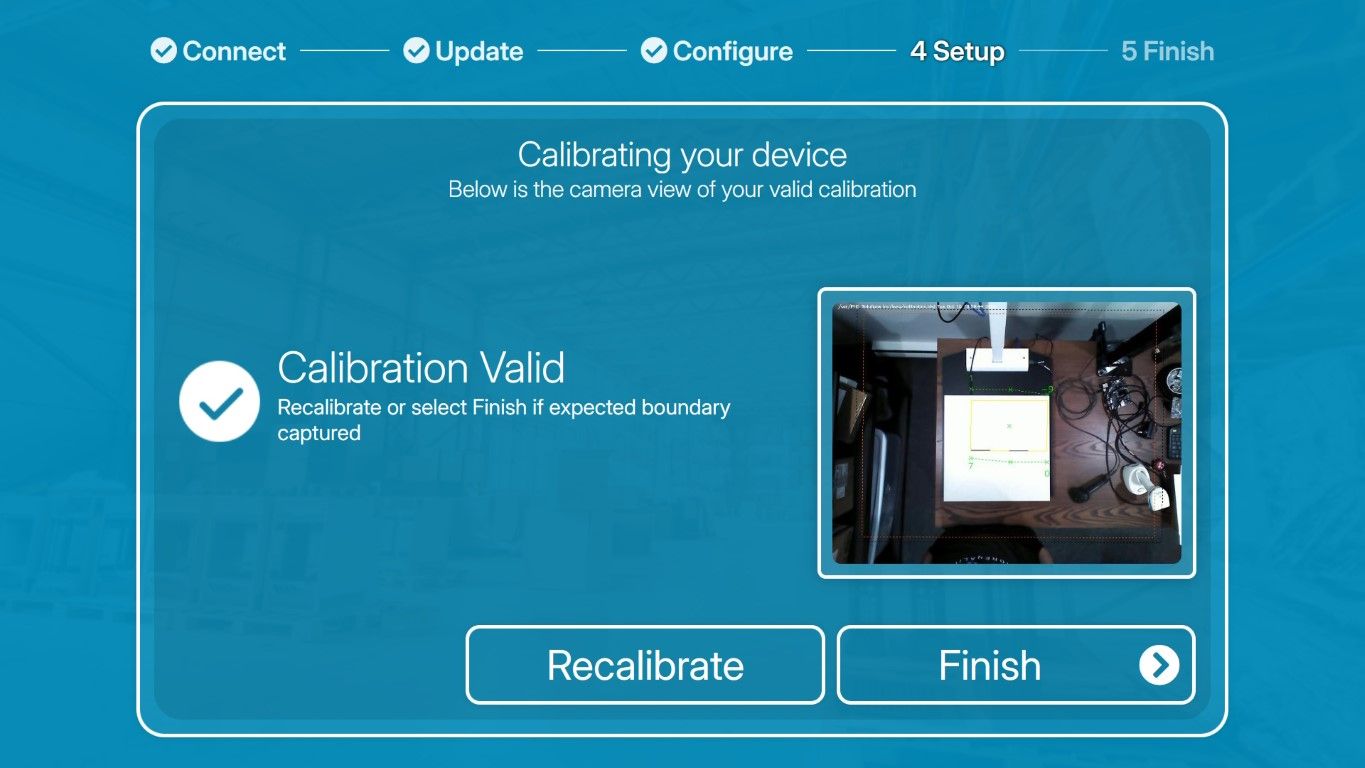
The view captured by the camera is shown on the right side of the screen, and tapping the image will expand the captured image for closer review:
If calibration is valid, you are done and can proceed to the next step. If not, continue reading for additional details. If camera calibration is not successful, you will receive a page similar to below:
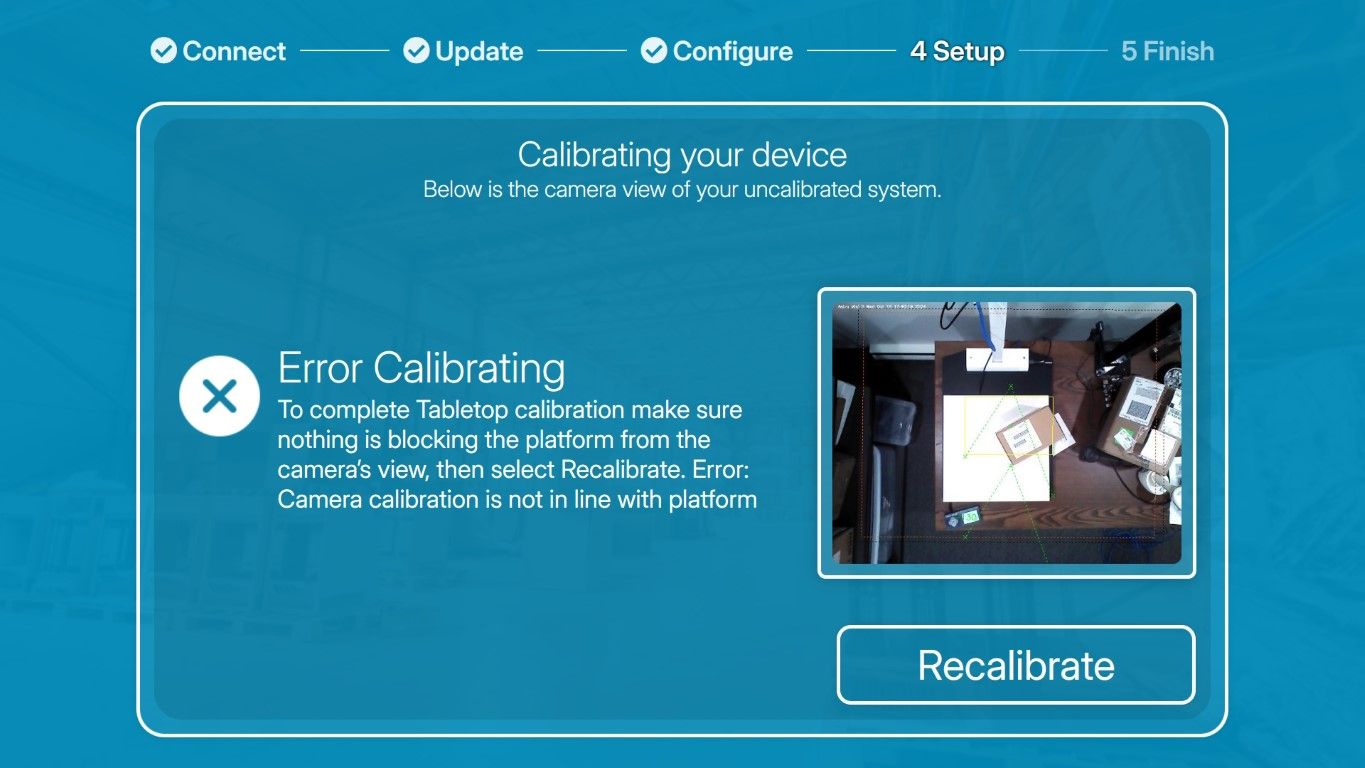
As detailed in the Error message, to complete a Tabletop calibration (that is to calibrate the device to the surface below it) ensure there are no objects blocking the camera's view, and then select 'Recalibrate'.
Recalibrating the Device
You can access the calibration system at any time by accessing the Settings area and choosing the Calibration option from the list on the right side of the screen.
Additional Details
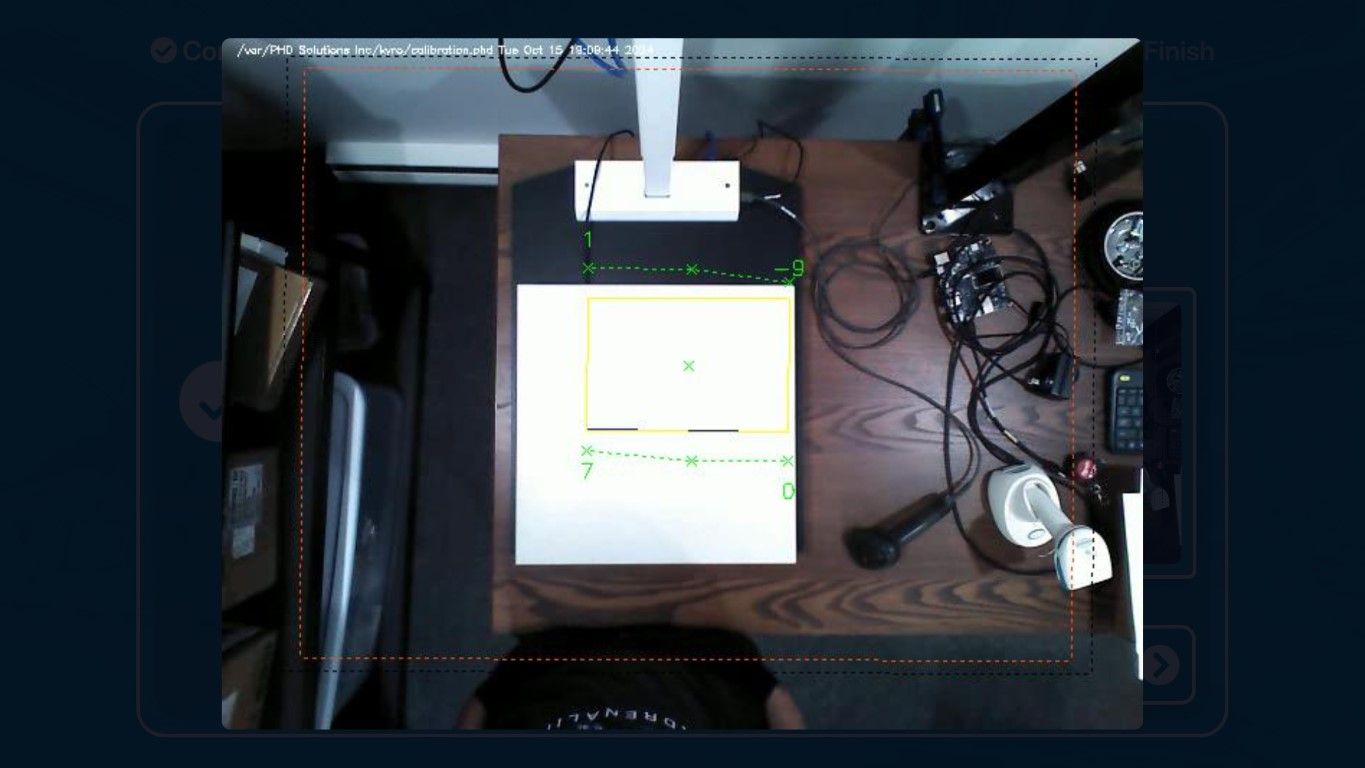
The rectangular box shown in yellow is the height offset sampling area the camera uses to determine its distance from the surface below it, and what it considers 0 height offset. Note that if your environment is modified, e.g. a scale is placed below the camera, a recalibration is required to adjust for the new offset. For an ideal calibration ensure that the yellow rectangle is fully encapsulated by whatever surface you will be using for your measurements.
For additional details about what the values on the calibration image denote, refer to the image below.
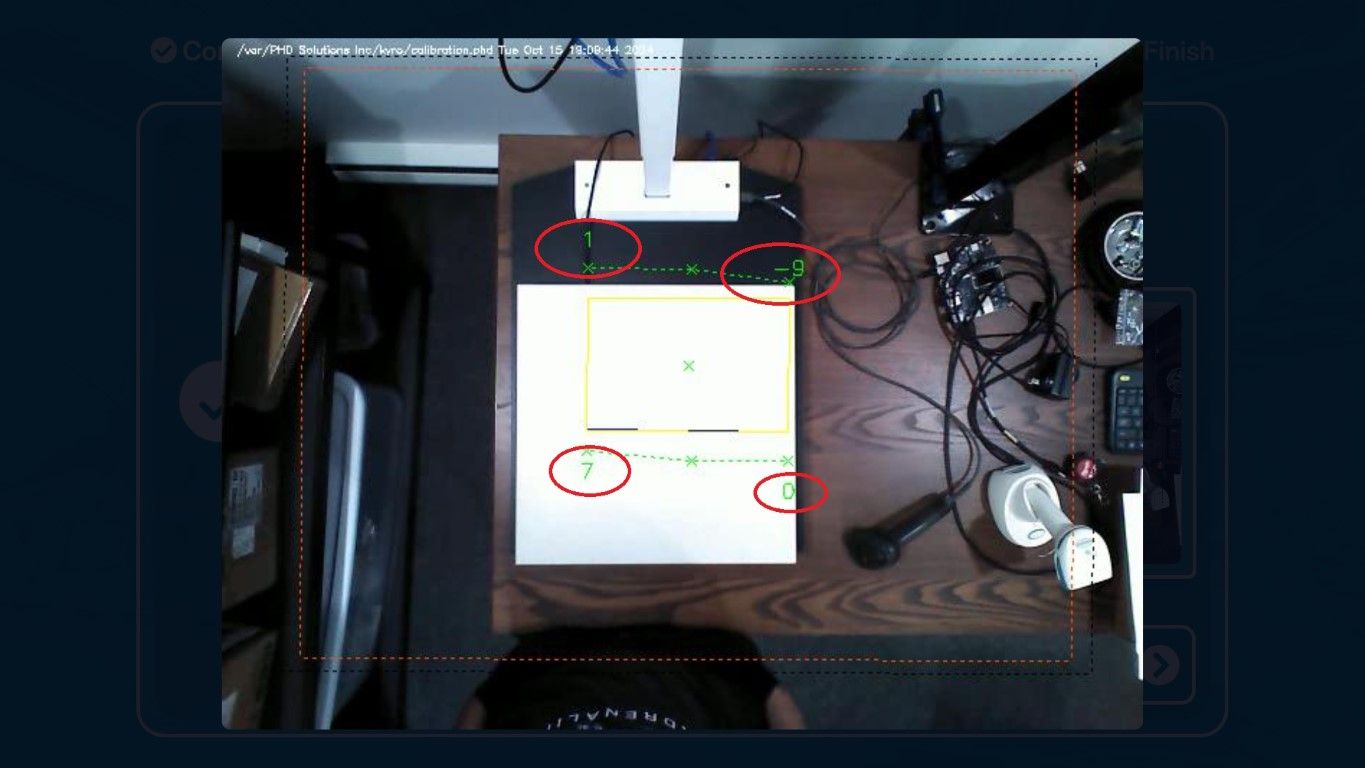
Shown are 4 values that show the deviation in camera height in mm from the camera 0 height offset. In the top left it shows a 1, which means the top left corner of the scale is 1mm higher than camera 0 height offset - this is excellent resolution. In the top right it shows a -9, meaning the scale is -9mm lower (i.e. further away from the camera) that 0 height offset. This is considered acceptable as camera may not be perfectly aligned with the surface below, or the camera itself may have a slight bias in one axis.
Below is an example of an unacceptable surface tilt - where the camera is not in line (parallel to) the surface below it at all.
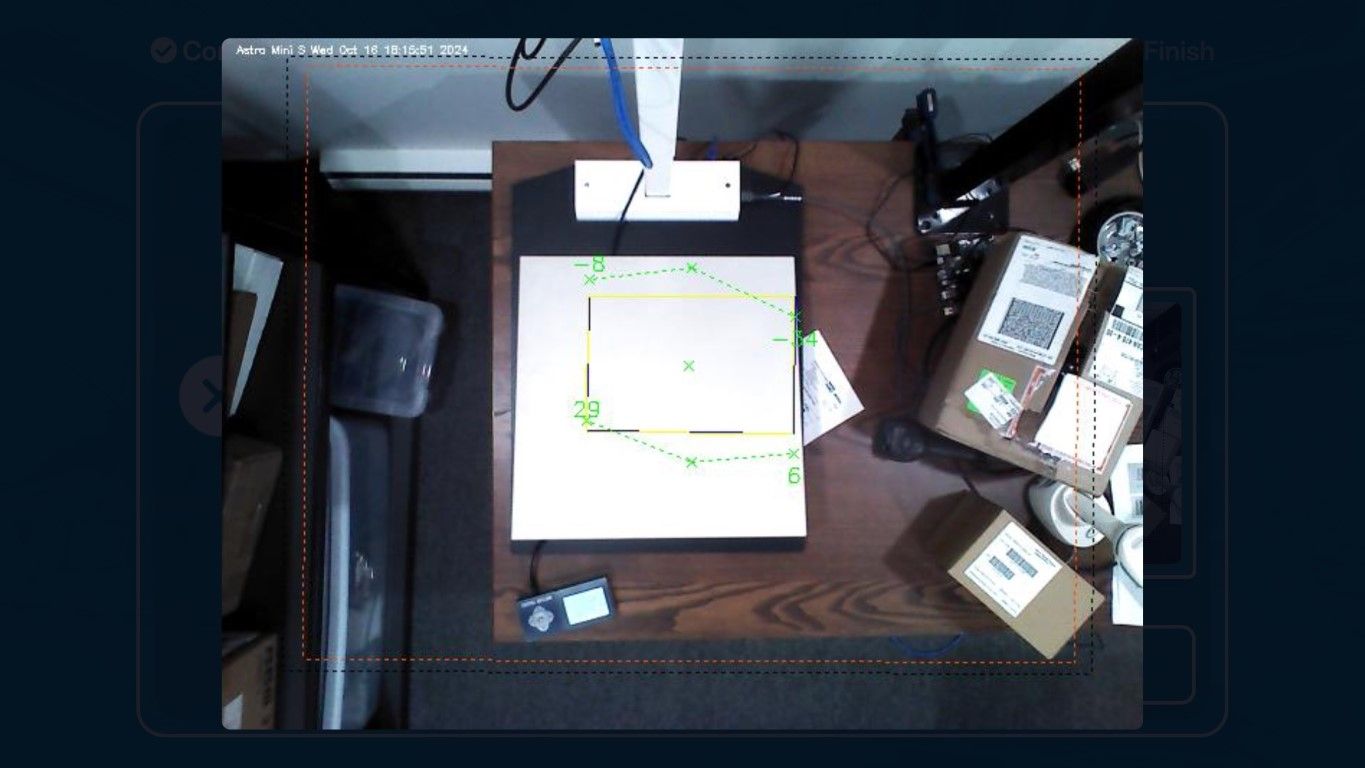
It is necessary to correct the alignment of the surface to the camera before trying again, as all calibration attempts will return invalid.